Module 1
Setup
Last updated on: 5 September 2024
Edit this page on GitHubModule 1
Last updated on: 5 September 2024
Edit this page on GitHubEffectively testing web applications for security vulnerabilities requires specialized tools, which this subtopic looks at.
The most important of these tools is an intercepting proxy server, which will allow you to directly interact with HTTP data as it flows back and forth between your browser and the target web server. This will let you observe what data is being exchanged and manipulate it without the interference of your browser or any client-side controls that are in place.
There are additional tools that can automatically test websites for certain types of vulnerabilities. These can both speed up testing, and catch certain vulnerabilities that you may have missed.
Finally, there are some tools that will be required for the practical activities in this learning path.
After completing this subtopic, practitioners will have the software and accounts set up to complete the rest of this learning path, and know how to use them, including the following software and SaaS solutions:
There are three main approaches for web application security assessment:
White-box testing: We have complete access to the application’s source code, infrastructure, and documentation. This comprehensive access allows for an in-depth examination to identify vulnerabilities, requiring skills in source code review and understanding application logic. It is the most thorough but time-consuming method.
Black-box testing: We start without any knowledge about the application, focusing on discovering information through enumeration. This approach is common in bug bounty programs and requires significant effort in the initial stages to identify potential vulnerabilities.
Grey-box testing: This method provides us with limited information about the application, such as authentication methods or framework details, offering a balance between in-depth analysis and external exploration.
Each method is chosen based on the specific context of the assessment, including the information available and the objectives of the engagement.
The primary tool used in web application security assessments is an intercepting proxy server. You may be familiar with other types of proxies such as:
Web proxies sit on the network in between a web application and web server, and act on that network traffic.
Web proxies are typically configured as either forward or reverse (transparent) proxies. In a forward proxy, the browser is configured to explicitly use the proxy server. The browser will then send a CONNECT request to the proxy, asking it to forward their request to the real server. Since the web browser tells the proxy which site it’s trying to connect to, forward proxies can make connections to many back-end (origin) websites. This is in contrast to reverse proxies (below). Reverse proxies do not appear to be a proxy server to the browser, but instead masquerade as the server itself. This can be an advantage for clients or applications that do not support proxy servers. Setting up a reverse proxy is typically more involved than a forward proxy, with per-site configuration and DNS changes. Since the browser doesn’t know that the reverse-proxy is even a proxy server, each reverse-proxy can only connect to one back-end (origin) website.
For a further explanation of reverse proxies, check out this guide.
The kind of proxy used for web application testing most commonly runs on the same computer as the tester’s web browser, though this is not required. That is the type of proxy we will be using in this learning path. The proxy will also perform TLS interception, decrypting network traffic. The key feature of these proxies is allowing the user to visualize, pause, and manually modify network traffic between the browser and server. For example, if the tester submits a form, causing their browser to send a POST request to the server, the proxy will allow the tester to see and modify the full request before it’s actually sent to the server. Different proxy servers may have many more features, such as scripting and automation features, site cataloging, and tools to automatically fuzz test web applications.
Two popular intercepting web proxies used for security assessments are Portswigger’s Burp Suite, and SSP’s ZAP. Burp Suite is paid software that comes with a feature-limited Community Edition, while ZAP is open-source. The majority of practice exercises in this learning path are provided by Portswigger, so are written with the use of Burp Suite in mind. However, you may use either proxy (or both). We recommend using Burp Suite Community Edition for most subtopics, but there is a subtopic dedicated to using ZAP for automatic security testing.
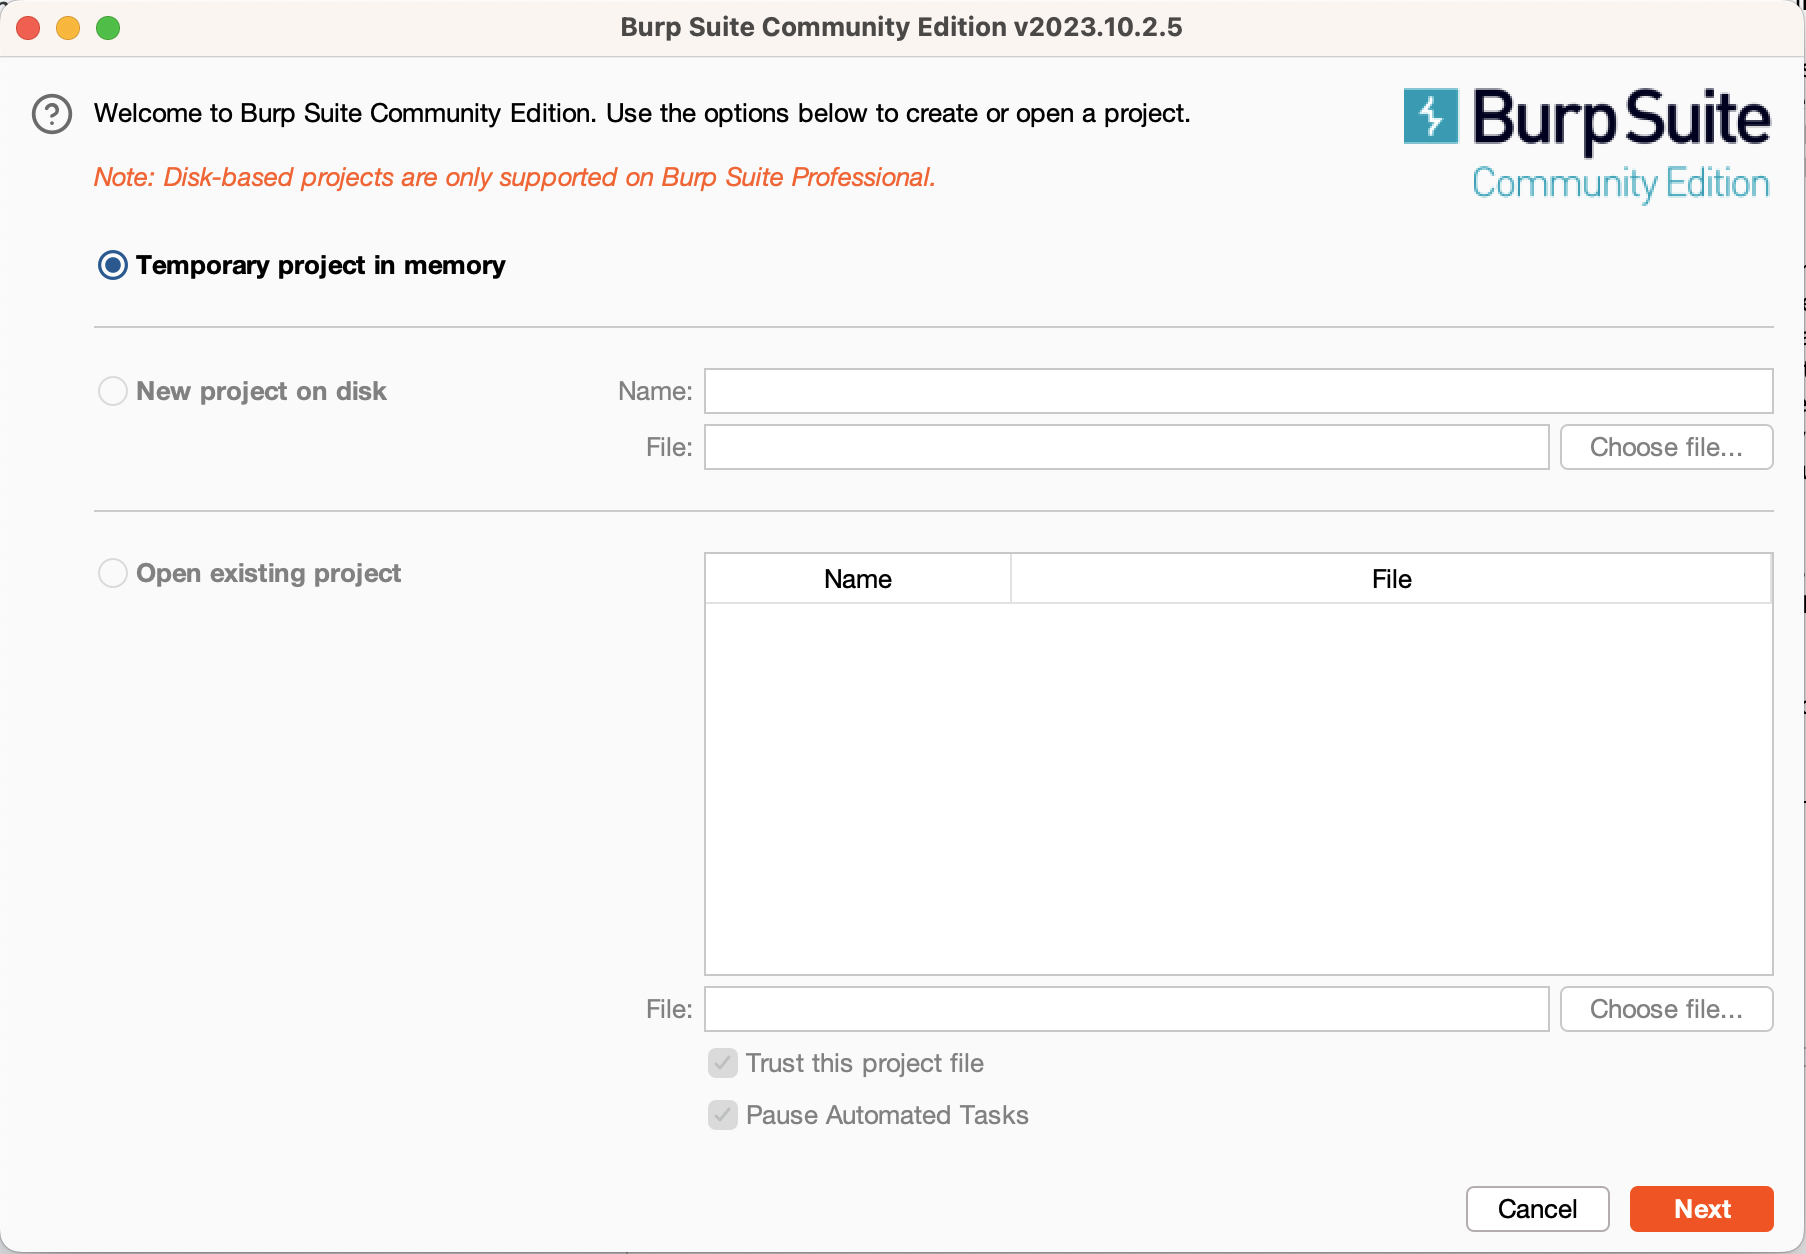
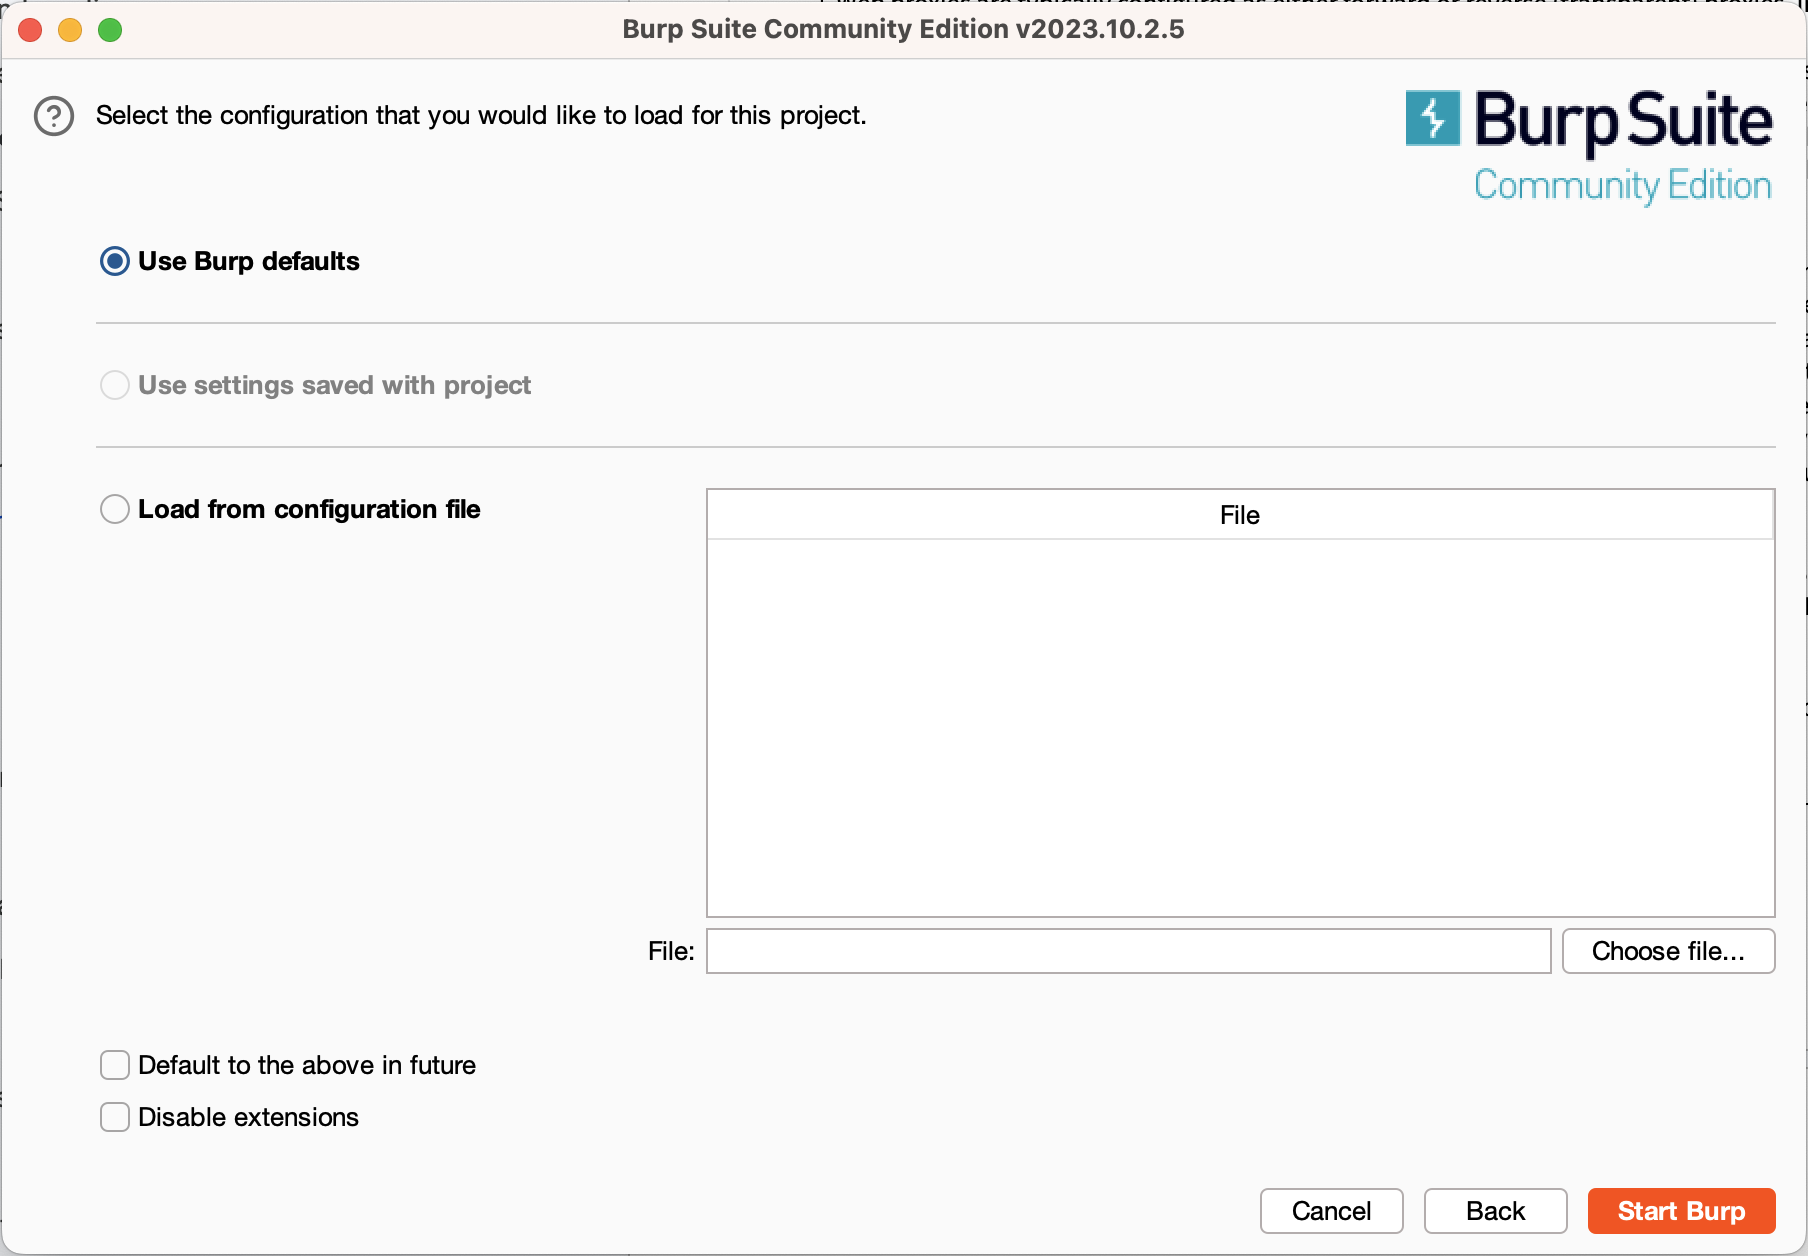
To get started with Burp, you must first download it. Once you’ve got it downloaded and installed, open the application. Before you start using Burp, it will prompt you to specify a project and a configuration. Projects let you keep track of your progress testing a site between sessions, but are not supported in the free edition, so just select “Temporary project”. You can also specify different sets of configurations, for now just select “Use Burp defaults.”
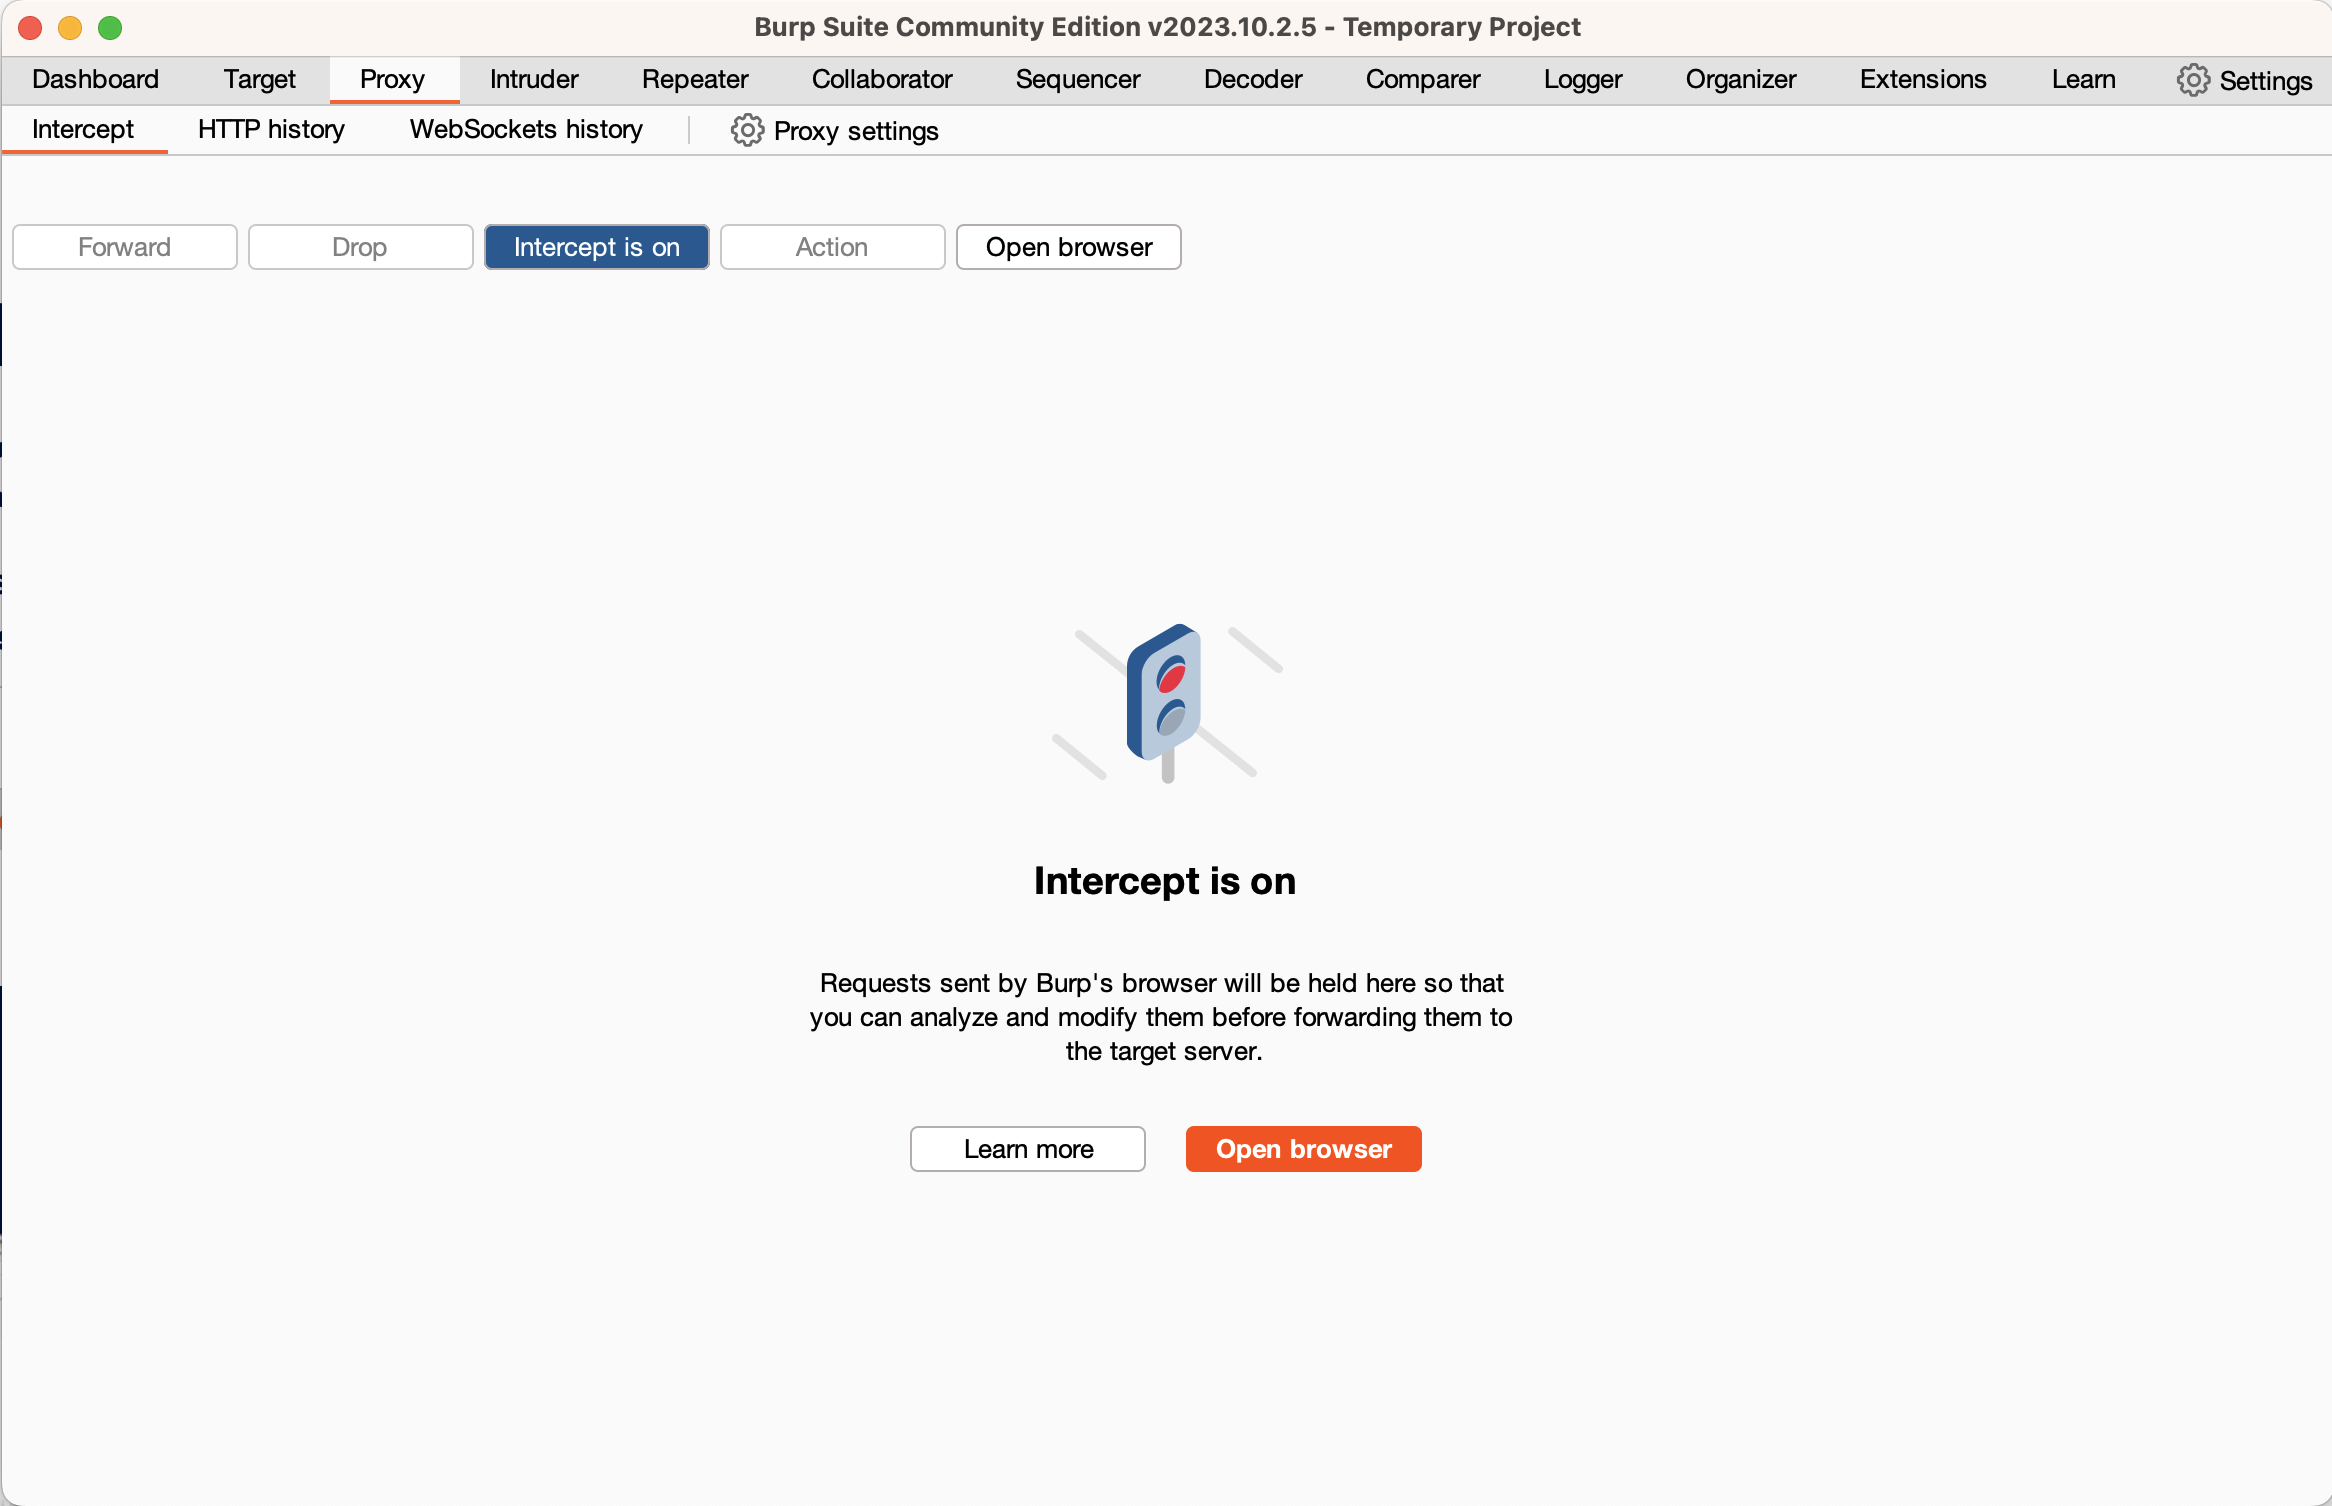
This will take you to the main Burp window. The primary tabs that you’ll be using are the “Proxy” and “Intruder” tabs. For now, switch to the Proxy tab and click the “Open Browser” button. This will open a Chromium instance that’s fully configured to use Burp. This embedded browser is configured to use Burp as its proxy and has its TLS configuration changed to allow Burp to intercept encrypted traffic. You can use this browser instance for testing web applications while you use your normal browser for general browsing.
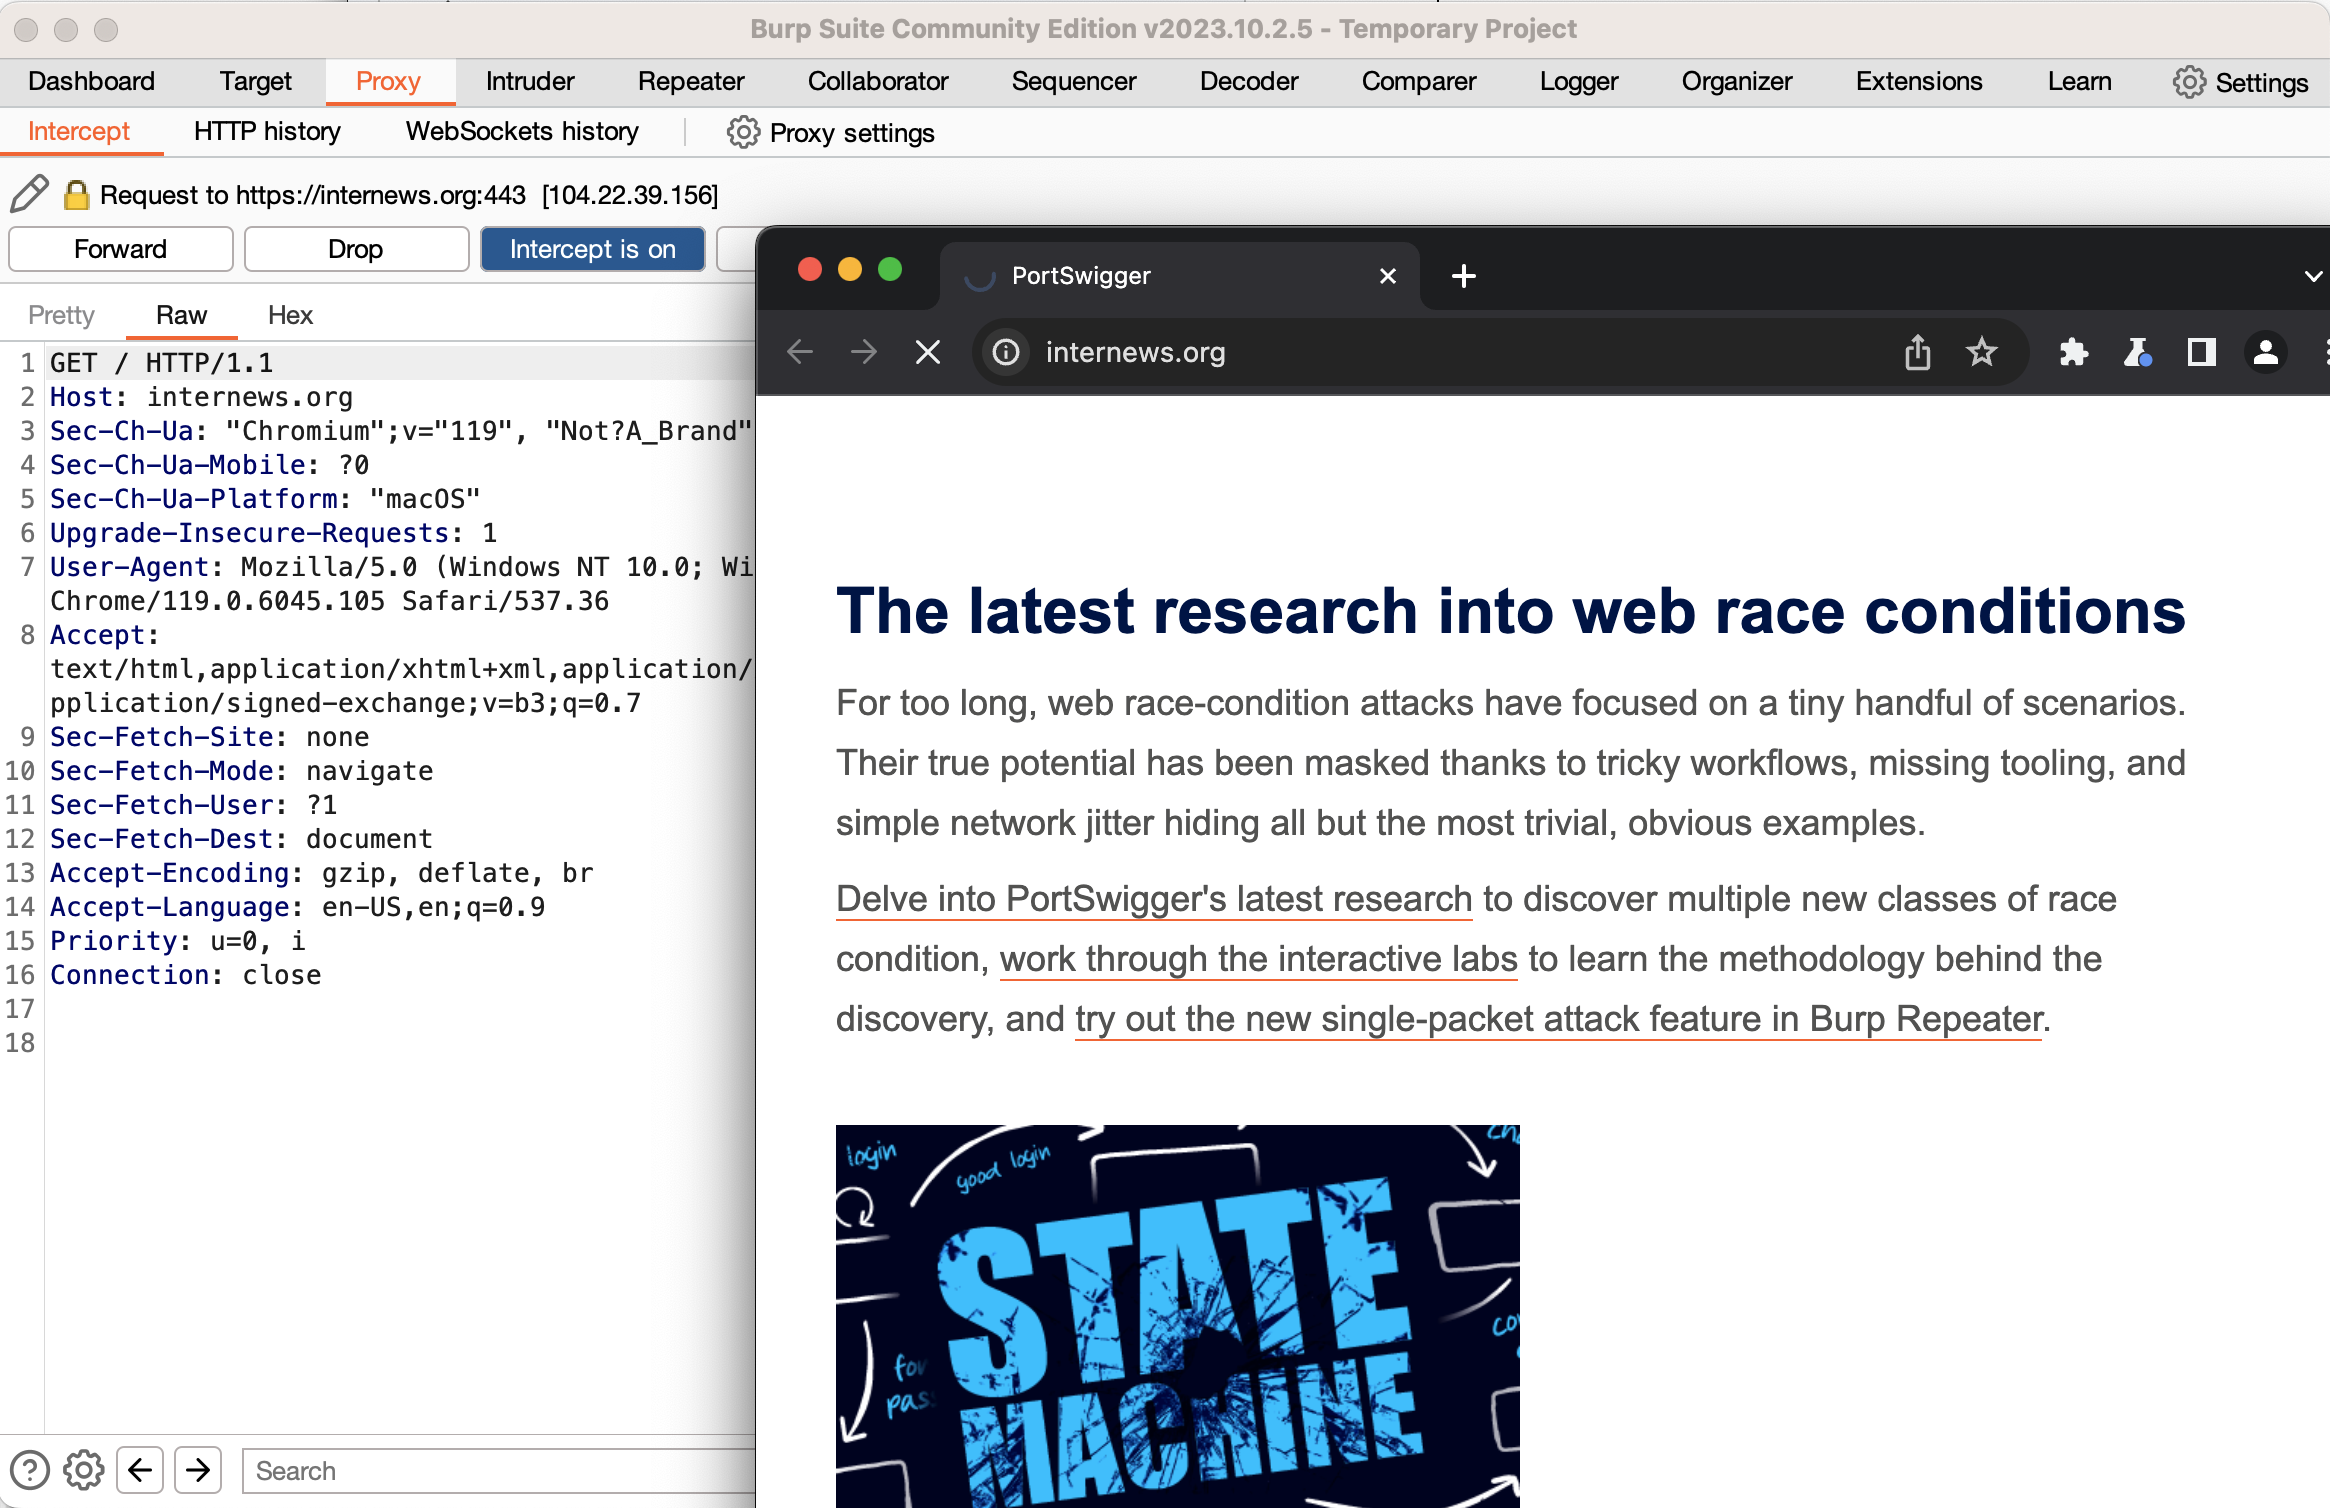
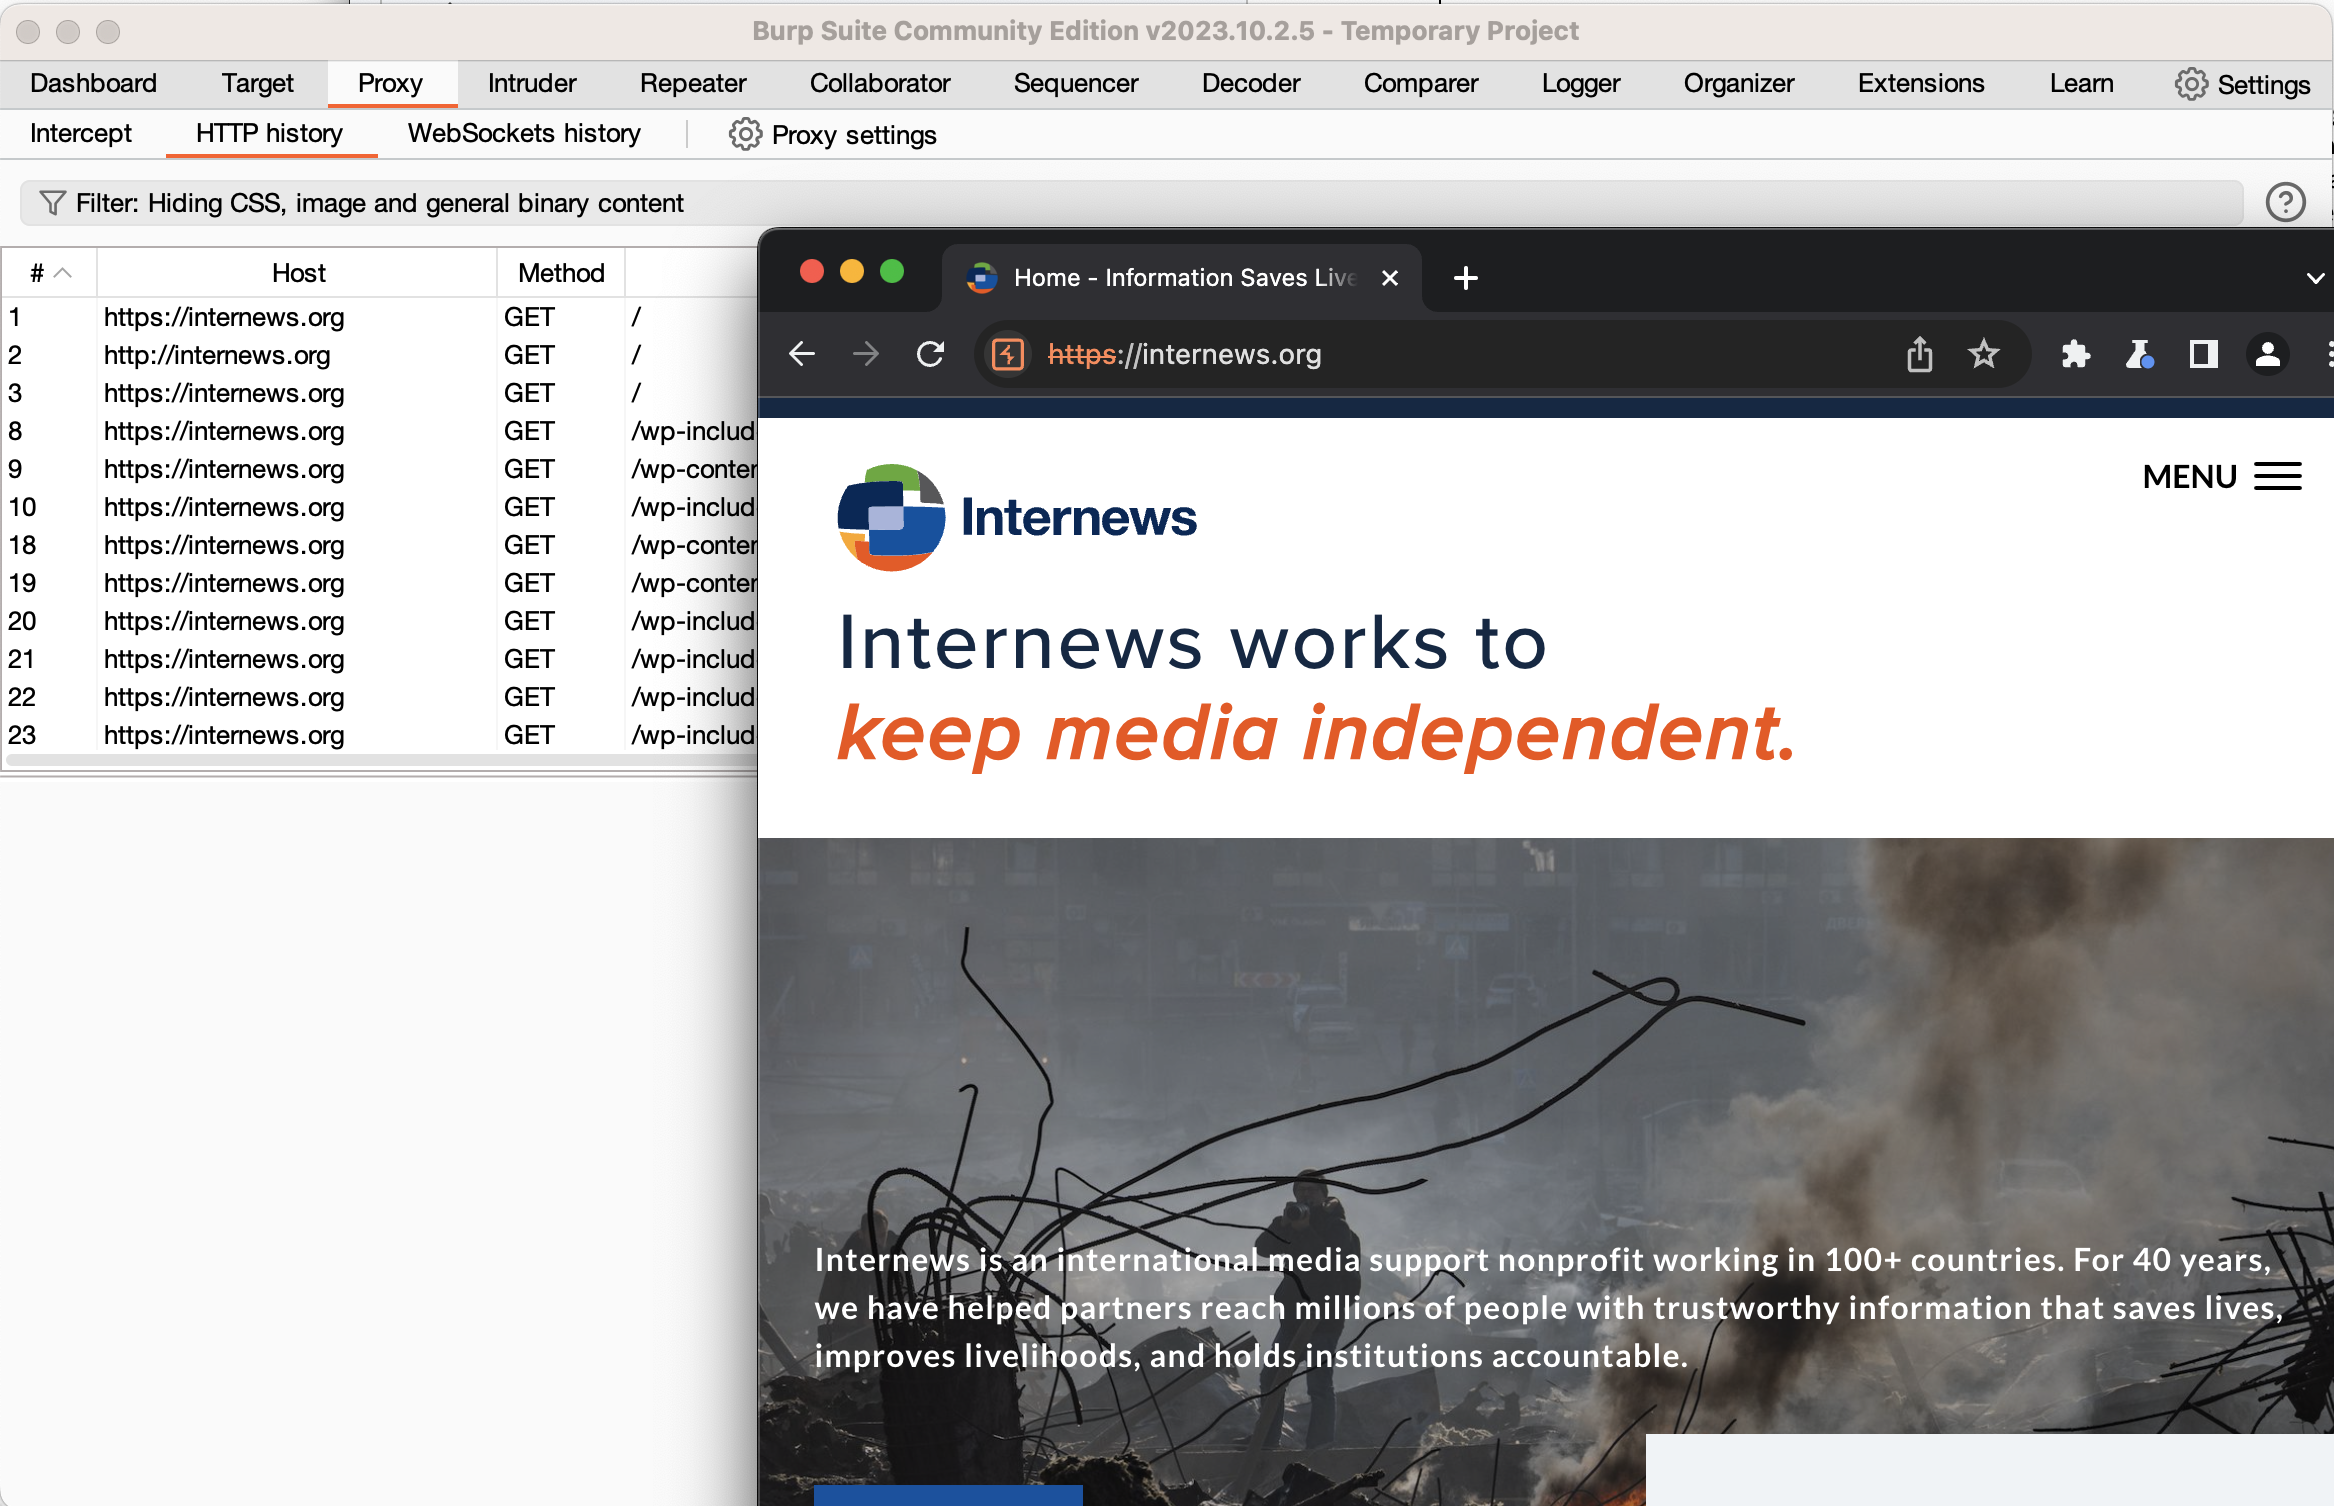
For now, type the URL of any website into Burp’s embedded browser and hit enter. You’ll note that nothing happens in the browser. Switch back to Burp, and you’ll see the HTTP request that the browser sent, and a button lit up that says “Intercept is on.” What has happened is that Burp has received the request from your browser but has not forwarded it to the web server. Instead, it’s allowing you to inspect and modify the request. For now, click the “intercept is on” button to turn off interception. If you look at Burp’s embedded Chromium, you should see the web page loaded. Switch back to Burp, and click the “HTTP History” sub-tab of the Proxy tab. You will see a log of all the HTTP requests that your browser has sent. If you click on one, you can see the full request, and also the response from the server.
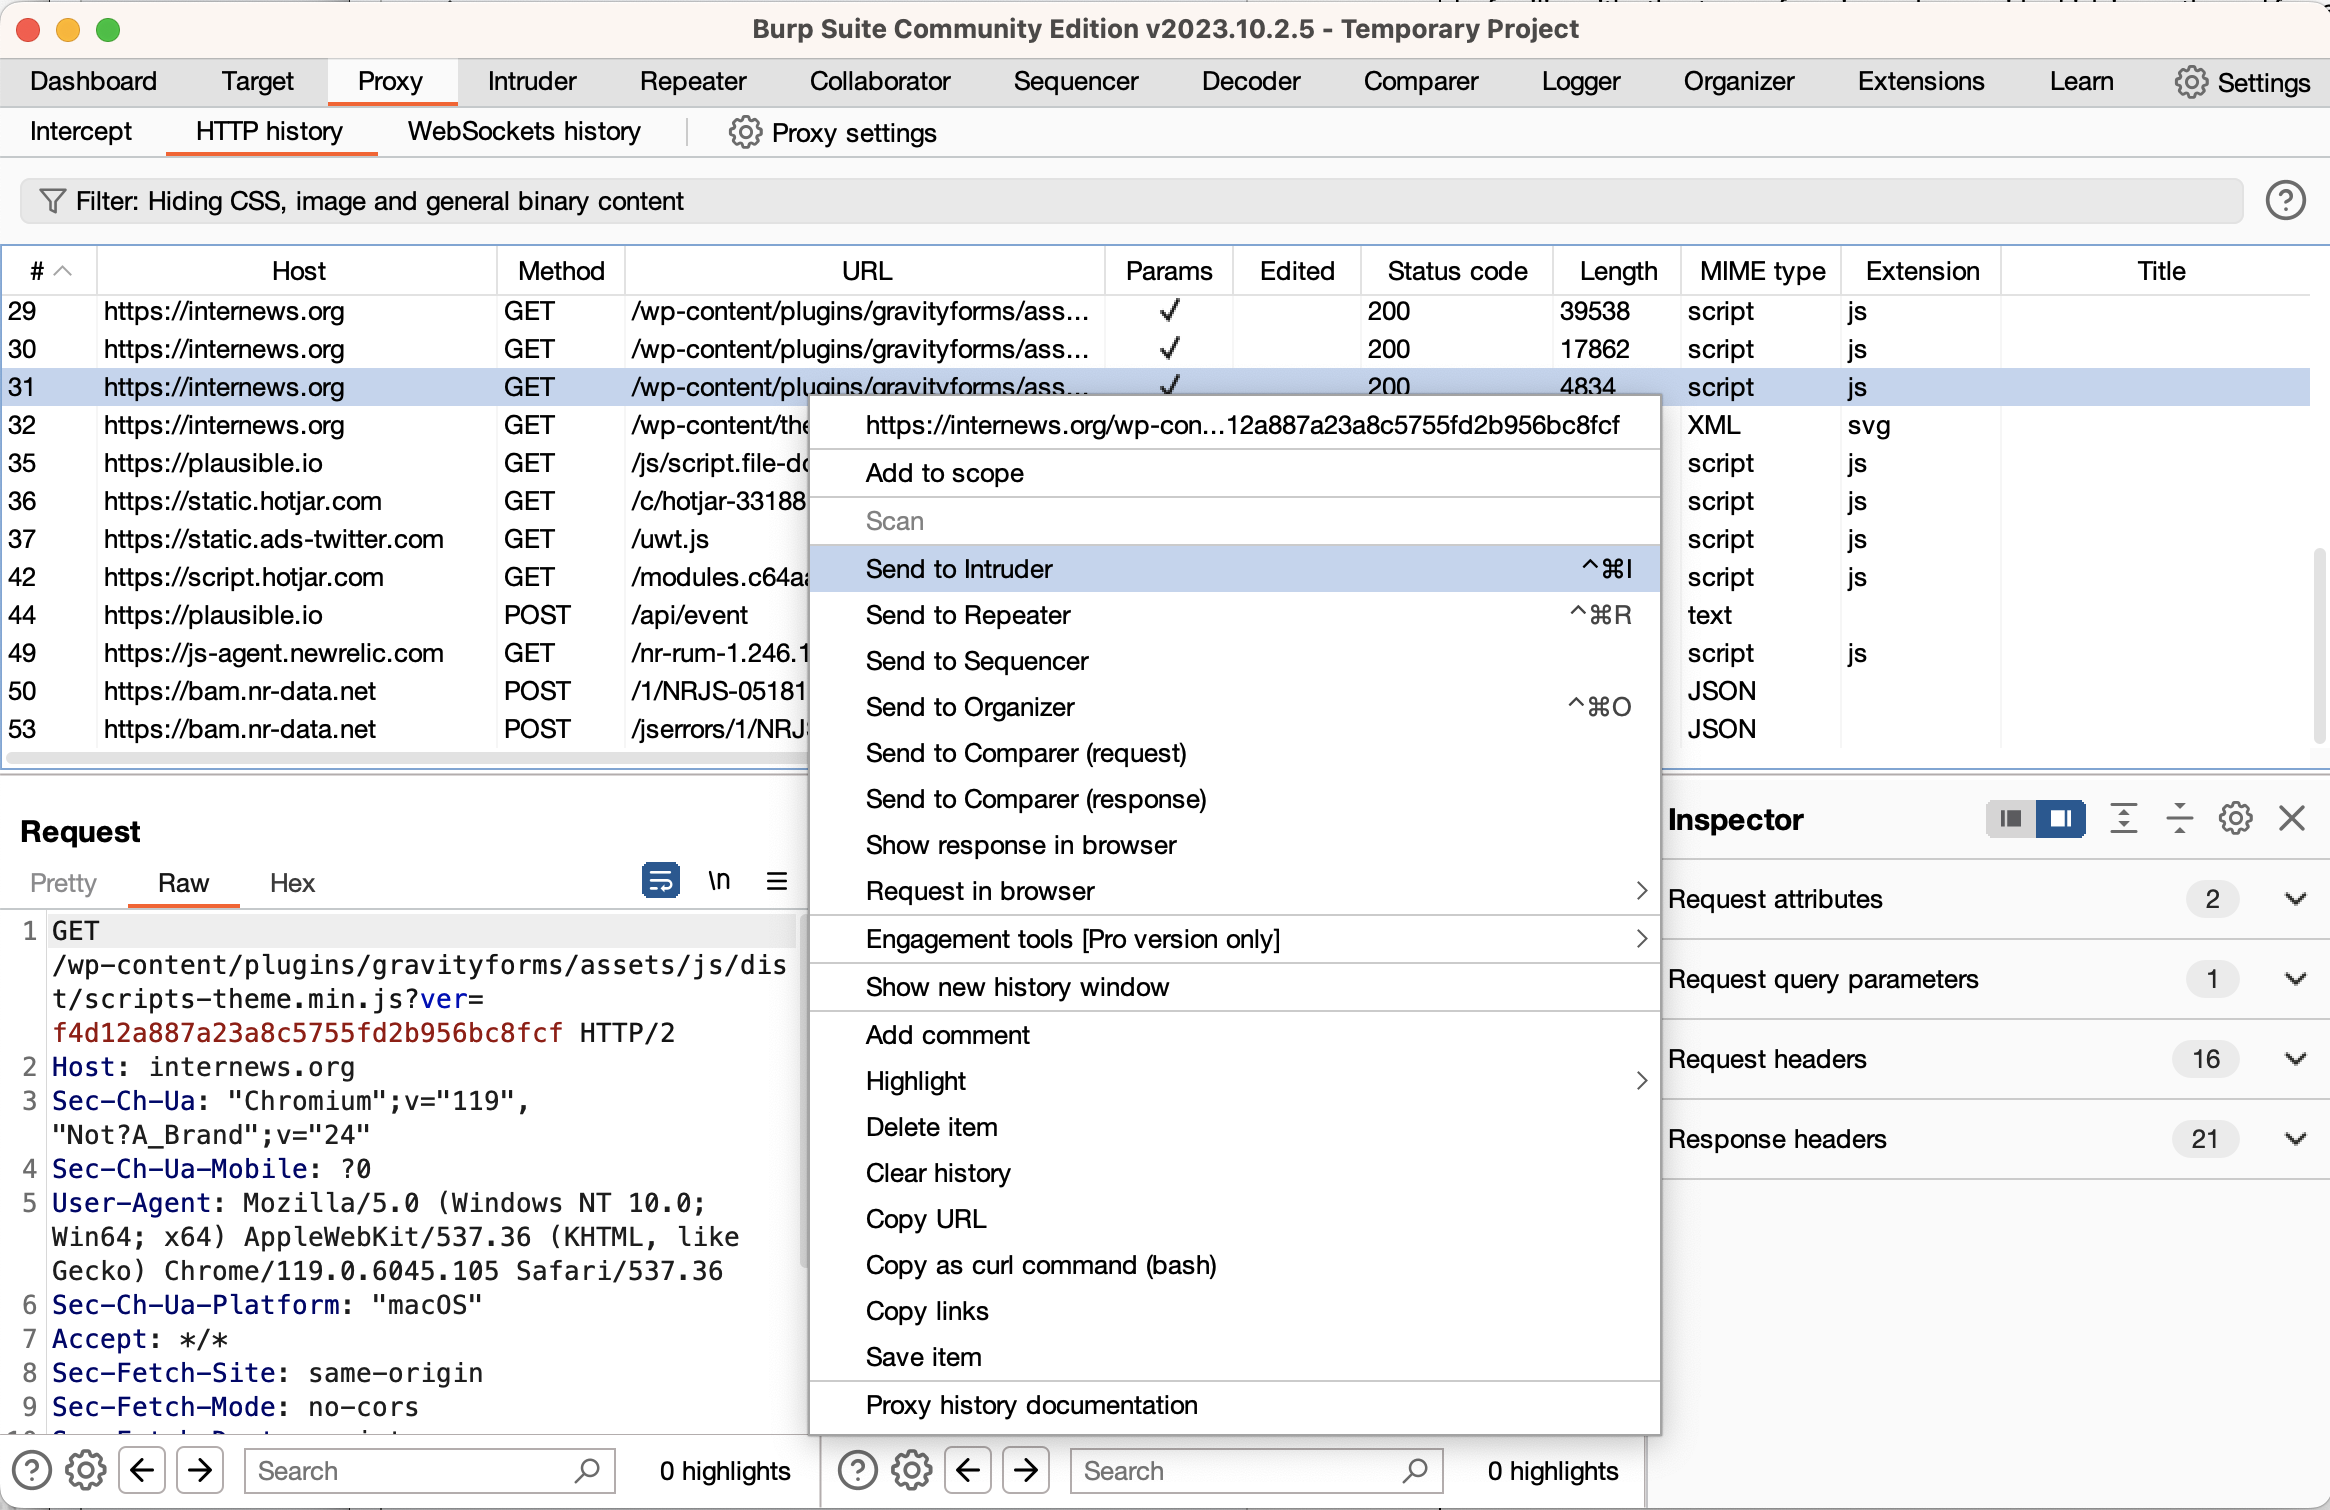
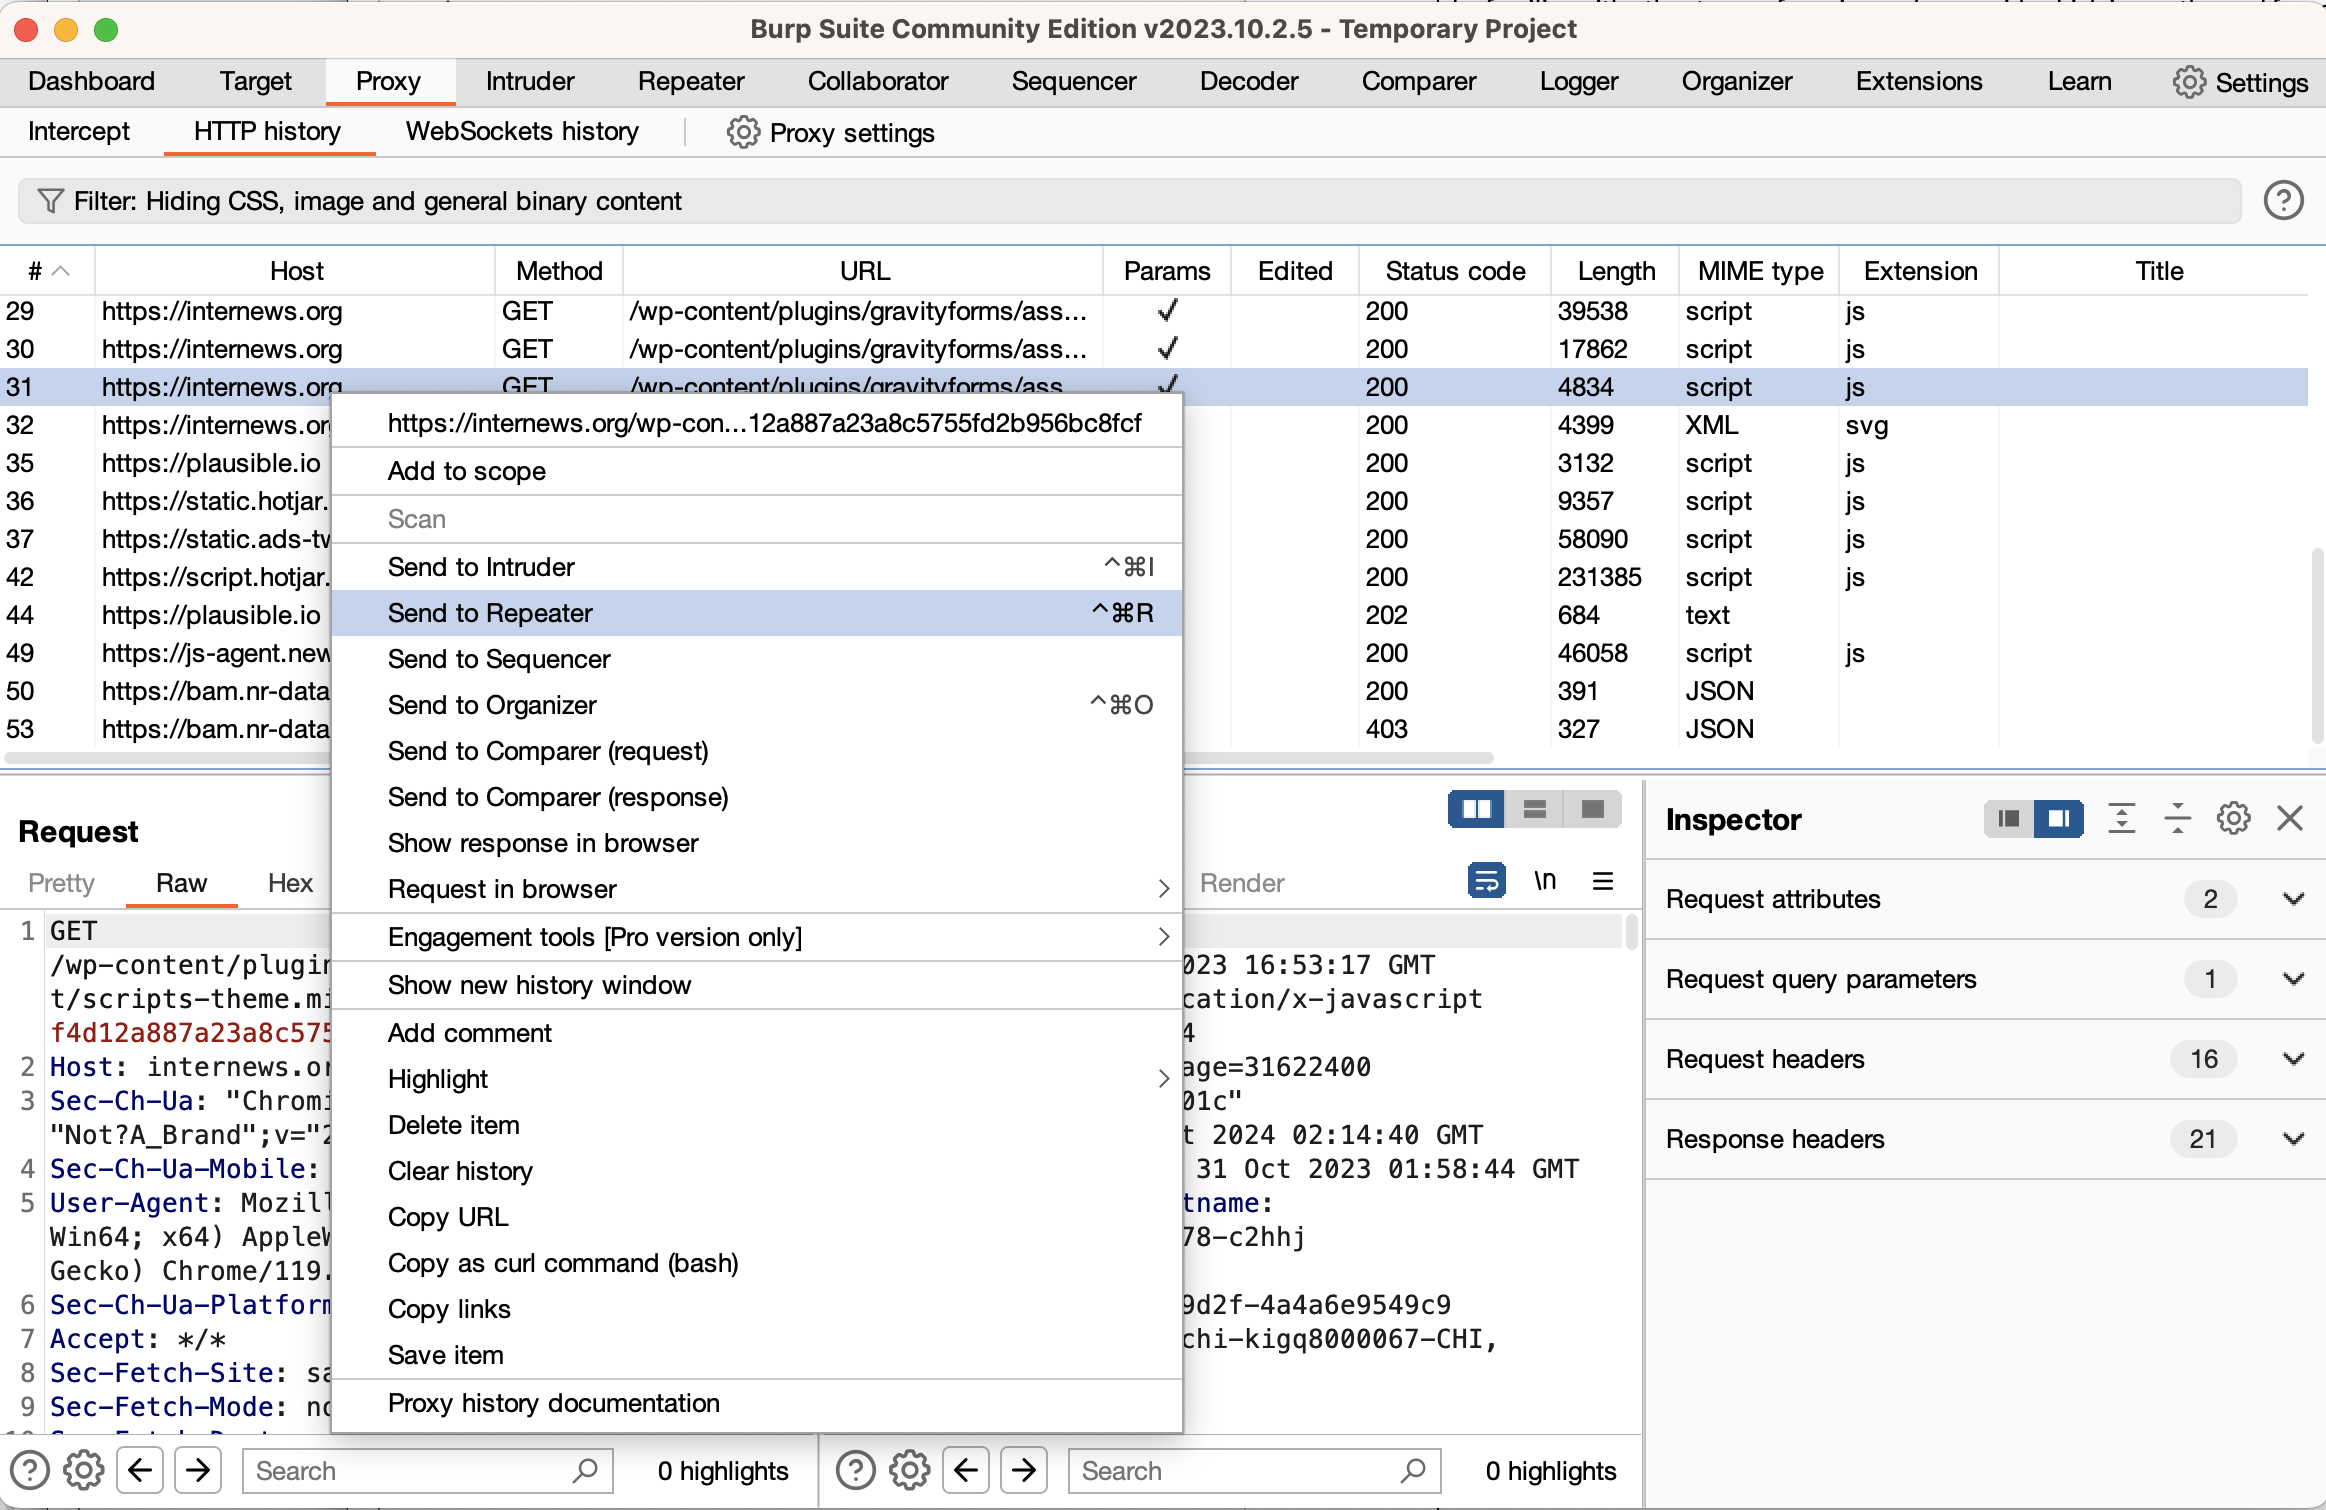
If you want to modify a request that’s already been sent, right-click that request and select “Send to Repeater”. Switch to the Repeater tab, and you will see the request on the left. A good practice is to immediately click the “Send” button to get a normal response. You can then edit the request, and send the edited request. You can use the “<” and “>” buttons to see prior requests and responses. Using the repeater tab is extremely important when performing security assessments, as you will see in the later subtopics.
One important feature of the Repeater interface is the “URL-encode as you type” feature. This will automatically encode characters as you type them, saving you many mistakes and a lot of time. Depending on what you’re modifying, you will either want this feature on or off. To change the setting, right-click on the Request pane and select the menu item.
This will get you started with Burp Suite. The free Community Edition is enough for this learning path, although most people who get paid to perform security assessments of websites elect to subscribe to the Professional Edition. Both the free and paid version include a large number of features, which are documented on the Portswigger website. You’ll be going much more in depth into Burp in most of the following subtopics (though you can use any proxy you want, if you prefer).
For all of the subtopics about vulnerability classes, the vast majority of the reading and exercises are hosted on the PortSwigger Academy. The PortSwigger Academy is a free website that includes reading and lab exercises covering the vast majority of common web security topics. The structure of those topics is a number of web pages that have links to lab exercises within the pages. You will need to use Burp Suite as described above to solve these labs. (Most labs can be solved with any number of intercepting proxies, but some require Burp specifically.)
In the subtopics below, each subtopic will assign a section of reading and labs from the PortSwigger Academy. When you’re completing those assignments, be sure to go through all the pages and complete all of the “apprentice” level labs. You should also attempt all of the “practitioner” level labs, but try not to get hung up on any one lab. If you get stuck on a particular practitioner lab, simply move on, and come back to it before you complete the final skill validation exercise of the learning path.
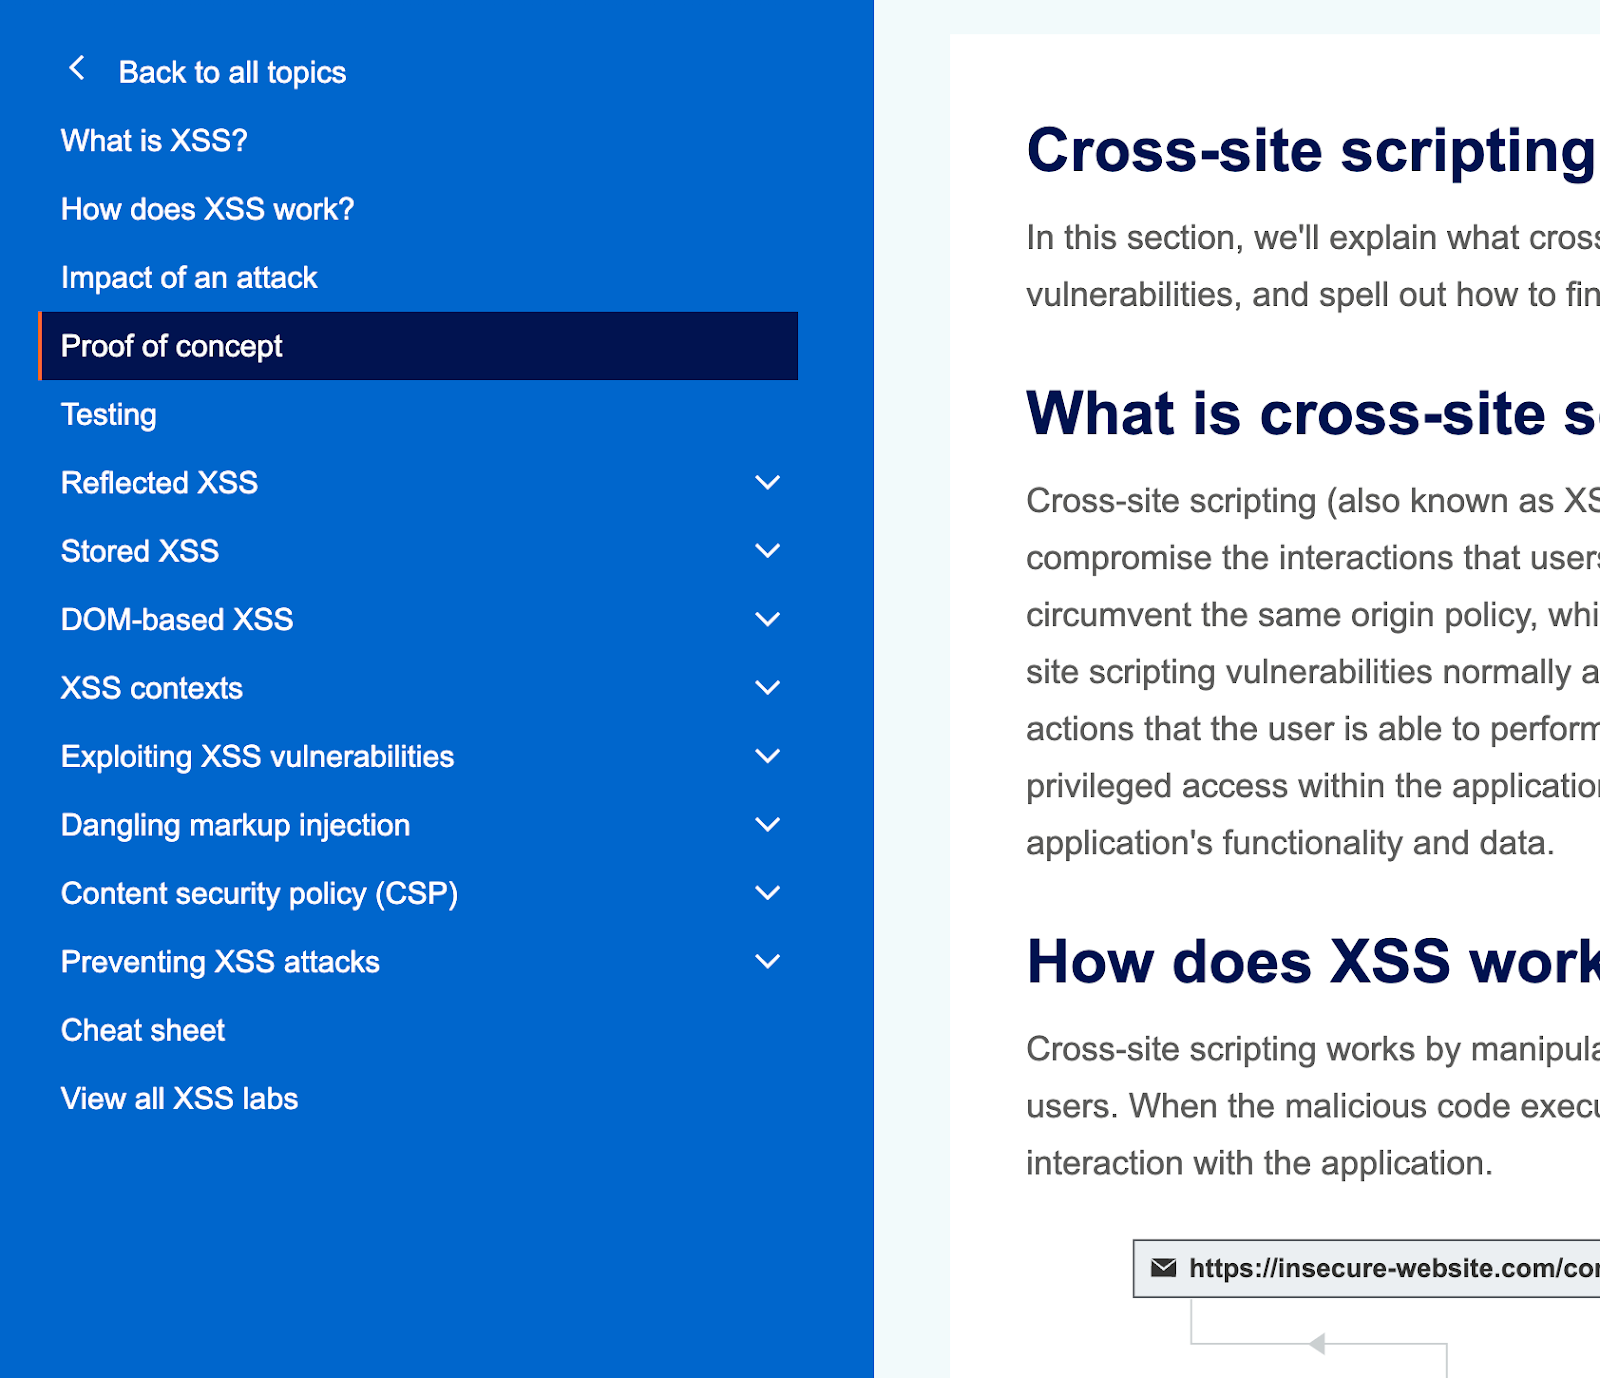
The PortSwigger Academy XSS topic. Be sure to go through all the subtopics. “What is XSS” through “Testing” are all one web page, but each subtopic is its own page.
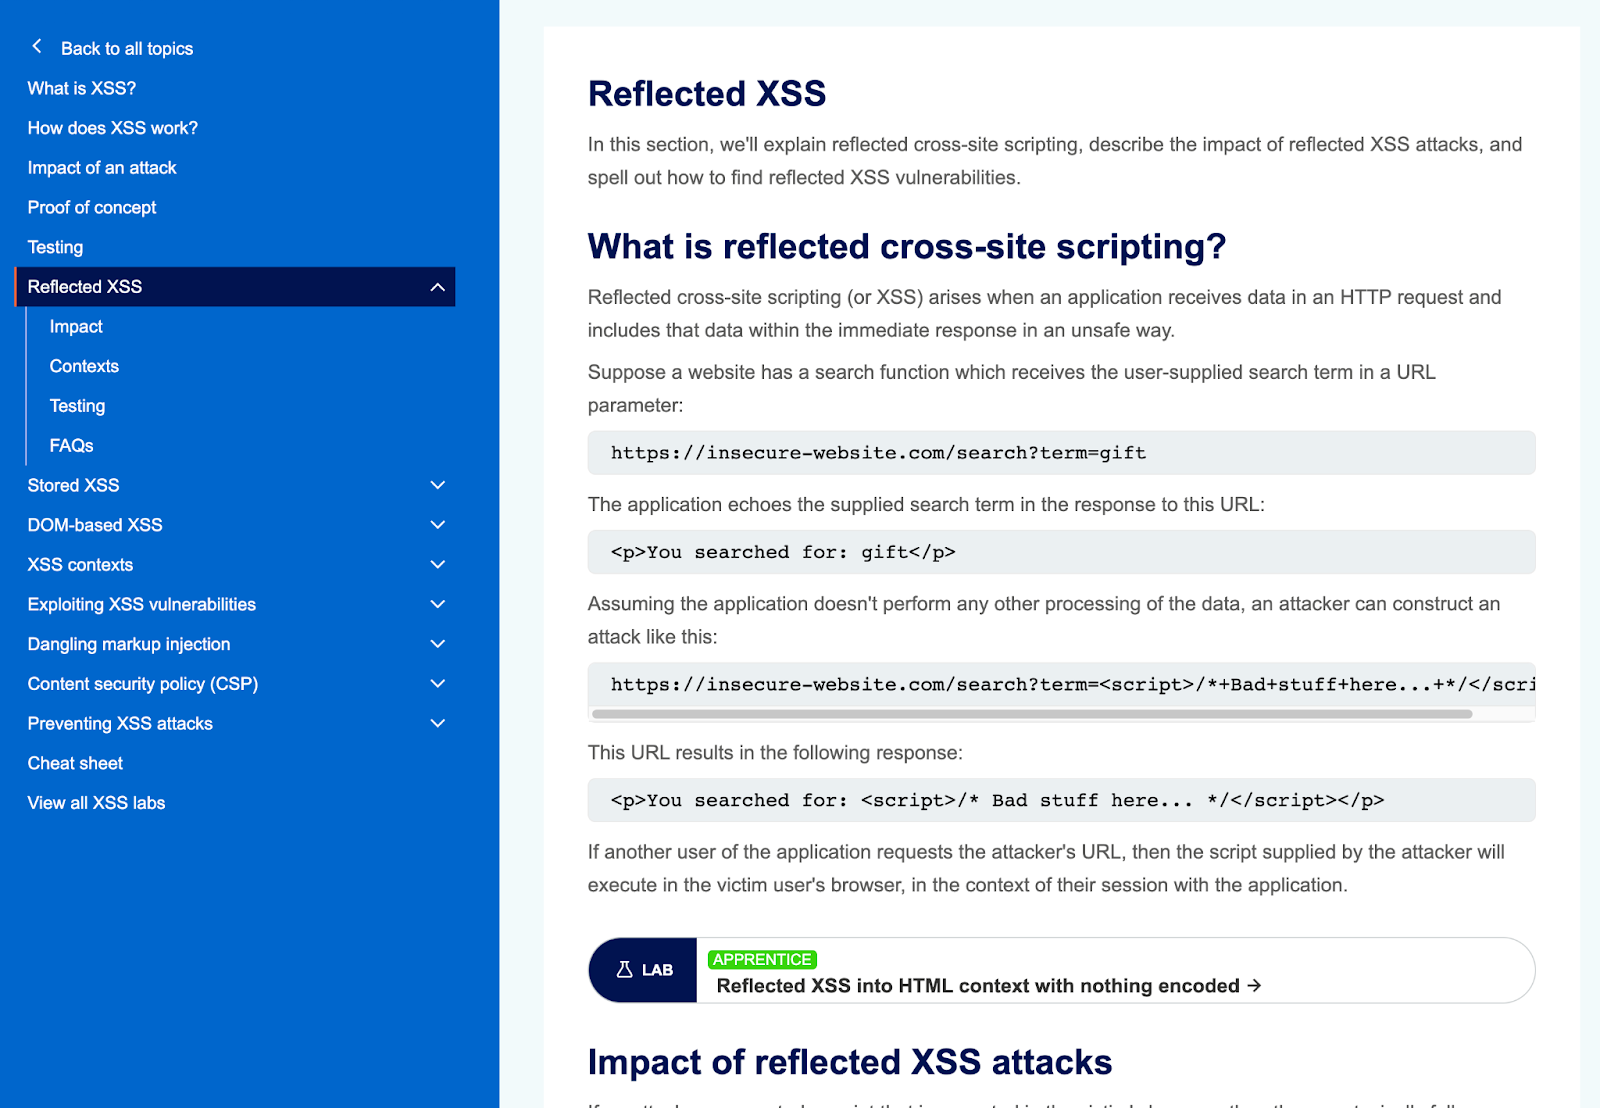
The PortSwigger Academy Reflected XSS subtopic. Note the lab linked towards the bottom of the screenshot.
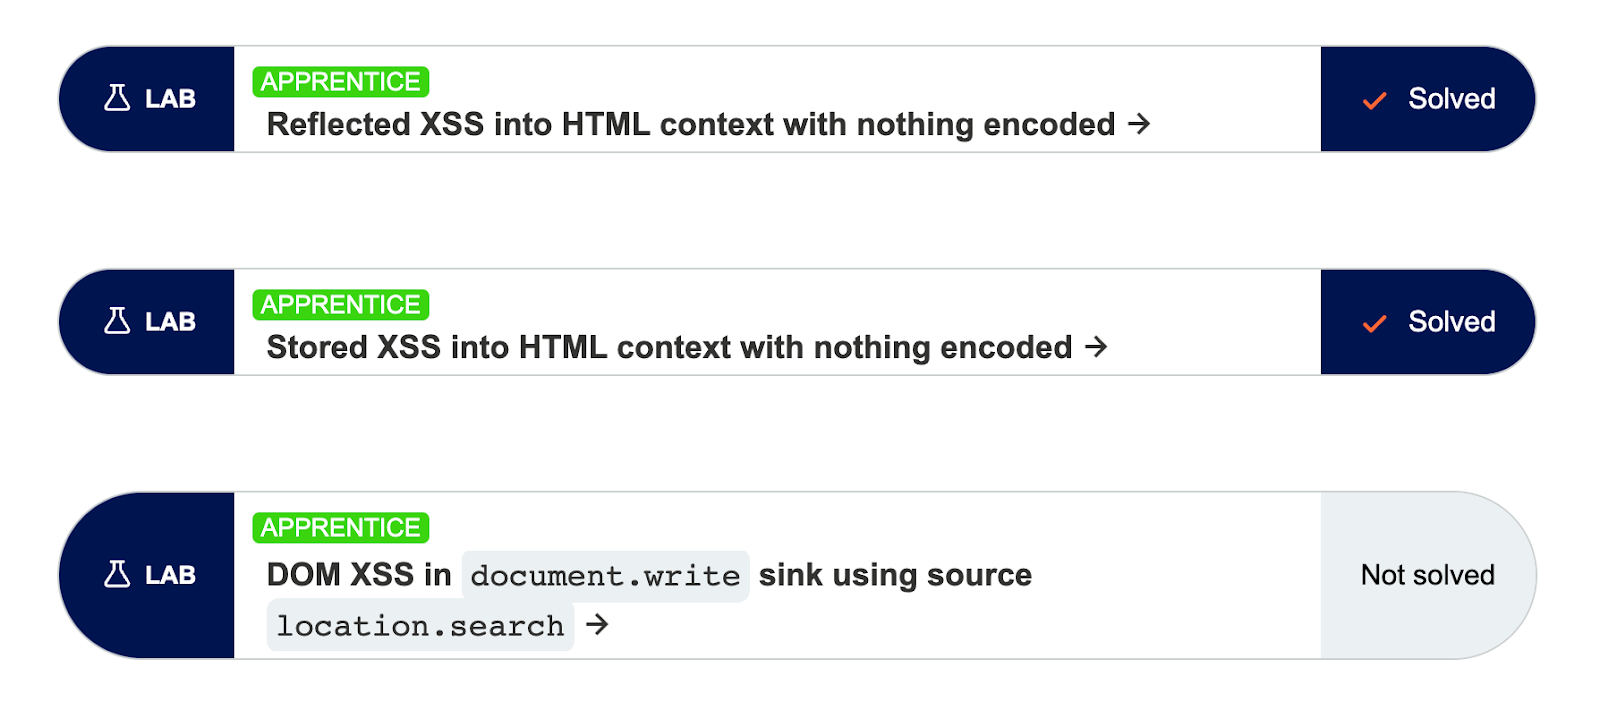
After completing a topic (e.g. XSS), double-check your lab completion by checking the “View all topic labs” link. This will let you see any labs that you missed.
Try it yourself
Head over to the PortSwigger Academy and sign up for an account.
‼️ If you’re feeling stuck on a lab, there are a number of walkthroughs and tutorials on YouTube and blogs. Note that following a walkthrough is unlikely to be very beneficial to your learning. If you find yourself needing multiple walkthroughs to get through the labs, you may want to take a step back, re-read the material, then try to carefully re-do some of the labs you previously completed using walkthroughs.
ZAP is an open source alternative to Burp Suite. While it is not as favored among professionals, it does have the distinct advantage of being free and including a web application security scanner. Although the UI is different between ZAP and Burp, the same basic features exist on each.
Try it yourself
Download ZAP, and then go through the Installation, Desktop UI, and Exploring an Application Manually section of the ZAP getting started guide. We’ll cover ZAP in more depth in the automation subtopic.
Docker is a system that allows you to run linux applications in a semi-self contained environment, called containers. Although they aren’t as secure as a full-fledged VM, containers are much more lightweight and flexible. On Windows and Mac, Docker includes a linux VM. For the purposes of this Learning Path, we will be using Docker to allow you to conveniently run full websites on your computer.
Try it yourself
Install Docker Desktop. You should not need to sign up for an account or acquire a commercial license to complete this Learning Path. Note that you have likely completed this as part of the Web Application Security Fundamentals Learning Path.
While humans can be very good at finding SQL injection vulnerabilities, exploiting those vulnerabilities often involves extremely repetitive work. sqlmap is a SQL injection tool that excels at exploitation. It has scripts that will figure out how to enumerate a database’s structure and extract content from that database using SQL injection. This is very useful both for demonstrating the seriousness of SQL injection vulnerabilities, and for finding other vulnerabilities related to data storage.
Try it yourself
Install sqlmap. You can either download it (it’s Python based) or use something like Kali’s package.
Within independent journalism and civil society, many media outlets use WordPress to share their content. WordPress is complicated software with many plug-ins and configuration options which can have large security impacts. As part of the automation subtopic, we’ll be using an open-source tool called WPScan to find security weaknesses in a WordPress site.
Try it yourself
Install the WPScan CLI. Note that this can be done from source, from a package manager (such as homebrew or rubygems), as a Docker container, or by using the version included in many penetration testing VM distributions such as Kali Linux. Which you choose is up to you. We’ll cover WPScan in the automation subtopic.
Make sure that you have installed and set up the following tools, which we’ve also listed above:
PortSwigger Academy
FreeCollection of explainers and labs on web application security.
What is a reverse proxy?
FreeOverview of reverse proxy compared to forward proxy.
Commercial proxies and content delivery networks: Fastly
VariedFastly, Cloudflare, Amazon CloudFront.
Commercial proxies and content delivery networks: Cloudflare
VariedFastly, Cloudflare, Amazon CloudFront.
Commercial proxies and content delivery networks: Amazon Cloudfront
VariedFastly, Cloudflare, Amazon CloudFront.
Burp Suite
Community version is free, Pro edition costs $449 per userPopular web security testing tool.
Docker Desktop
FreeTool to install containers containing executable applications.
Congratulations on finishing Module 1!
Mark the checkbox to confirm your completion and continue to the next module.
Marks the current module as completed and saves the progress for the user.
You've completed all modules in this learning path.